You're Invited!

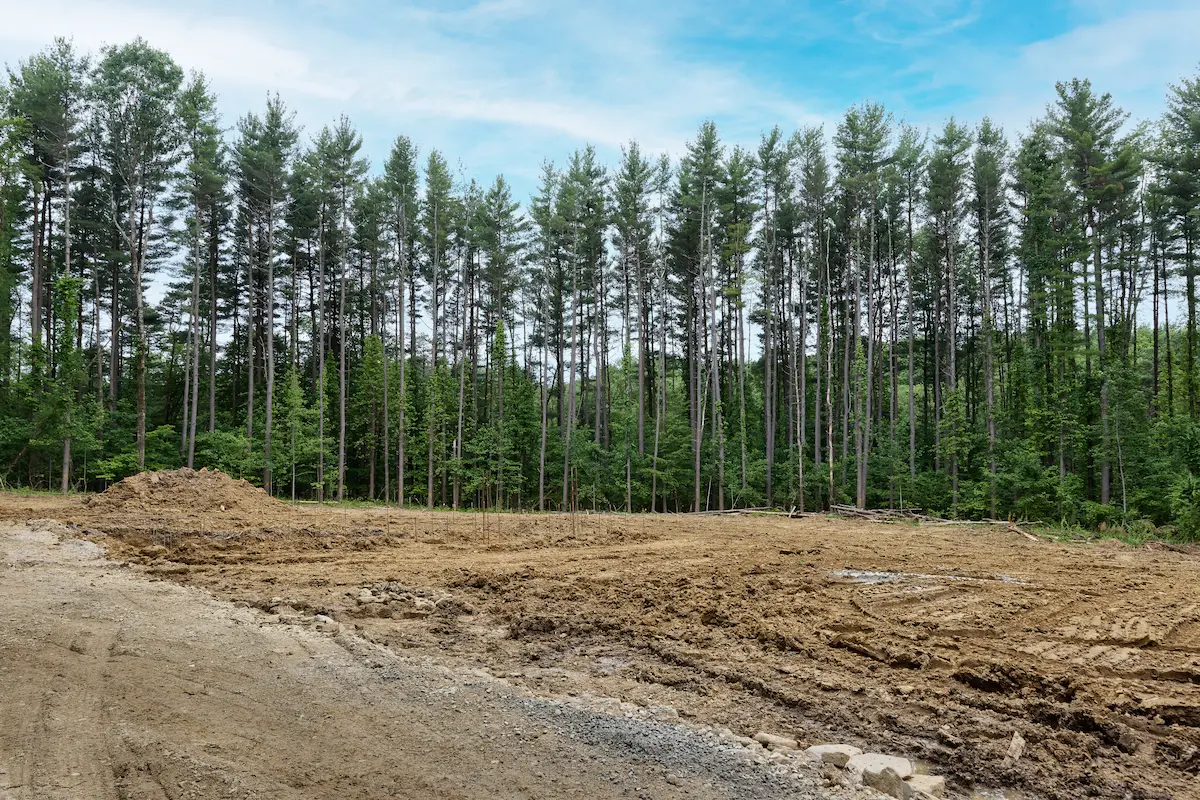
Every log home begins with shaping the land that will hold it. At the Trumpower Road Retreat, the first step was clearing a buildable footprint within the wooded six-acre lot. Trees were selectively removed, stumps and roots were pulled, and the ground was opened enough to prepare for excavation.
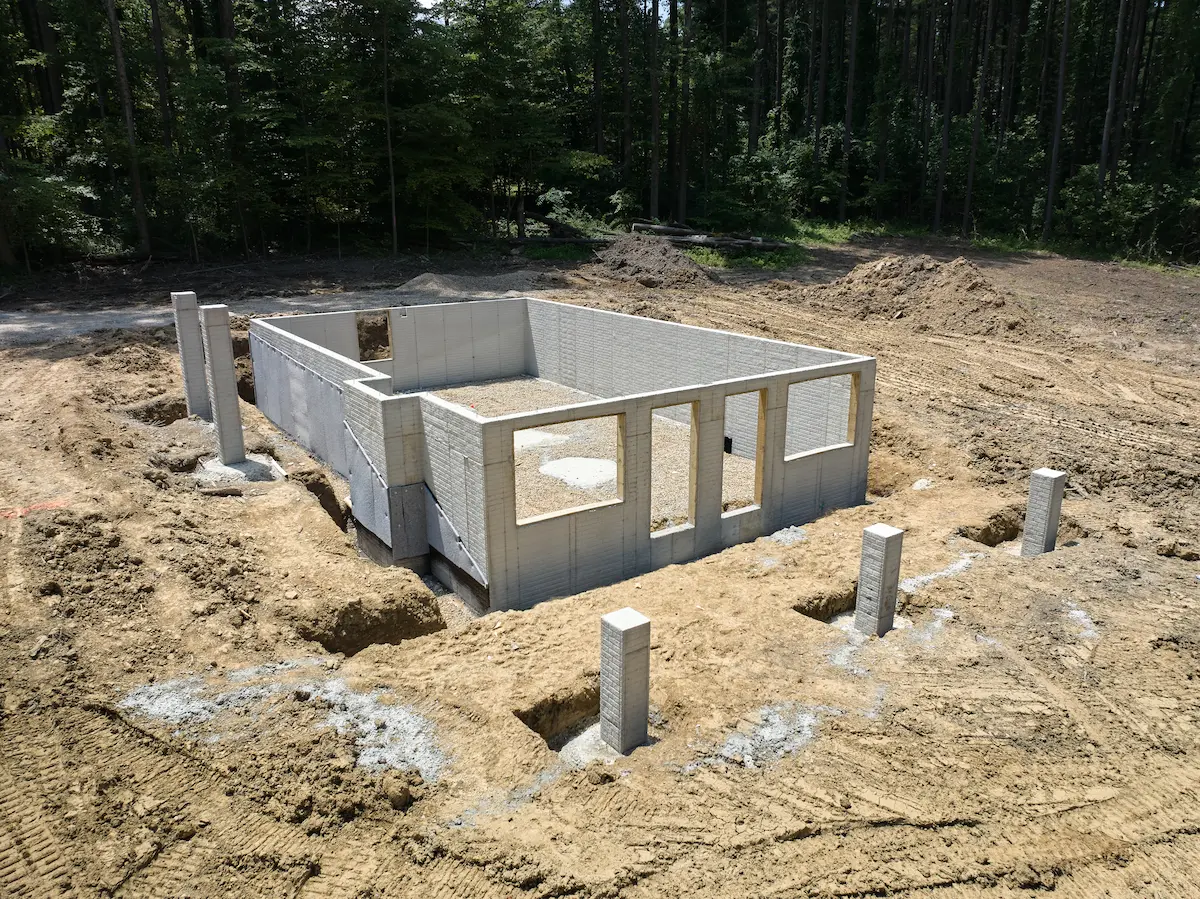
With the site prepared, the build moves to one of the most important stages: establishing a strong foundation. Here, the footprint of the home becomes visible for the first time. Concrete footings are poured to carry the weight of the structure, and you can see how each pad supports key load-bearing points of the Hochstetler floor plan.
Once the footings cure, the foundation walls take shape. This step sets the exact elevations and outlines the lower level of the home.
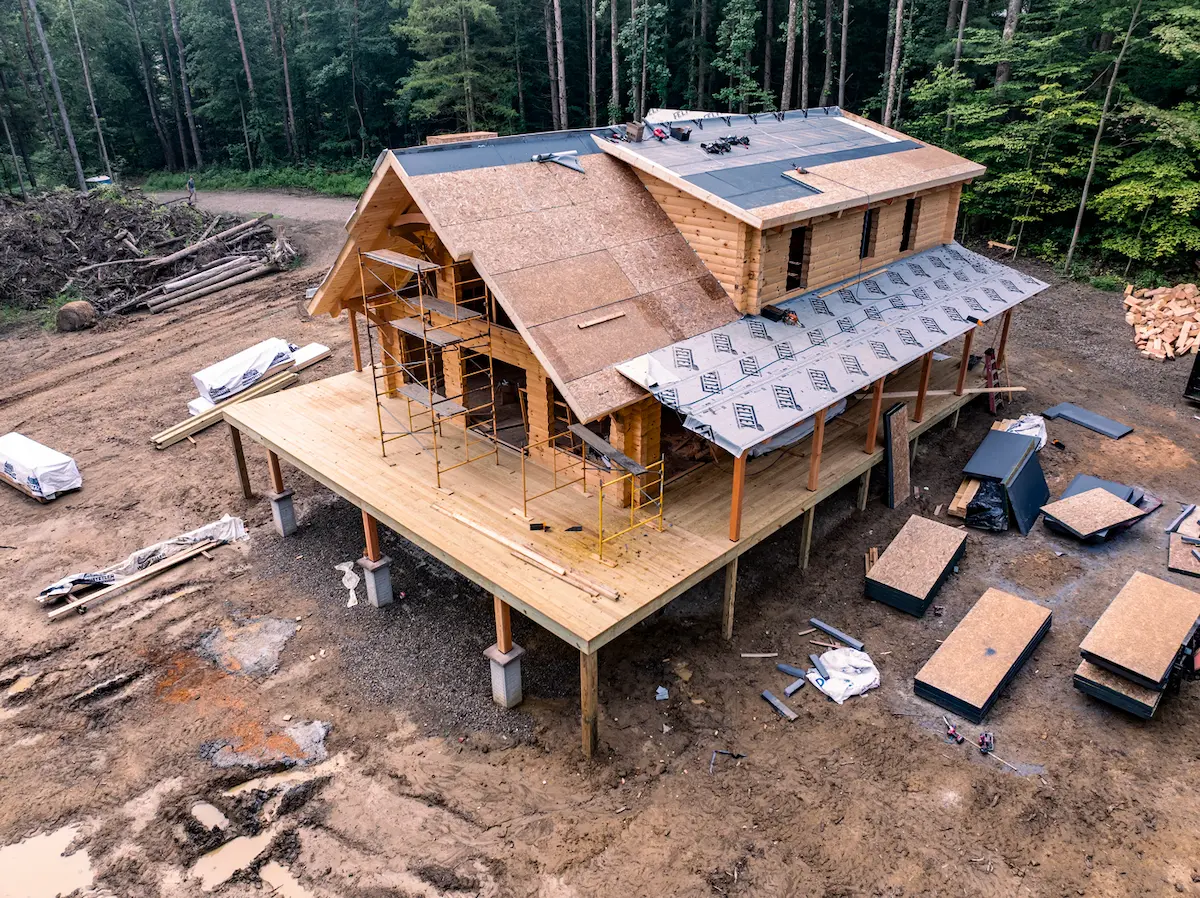
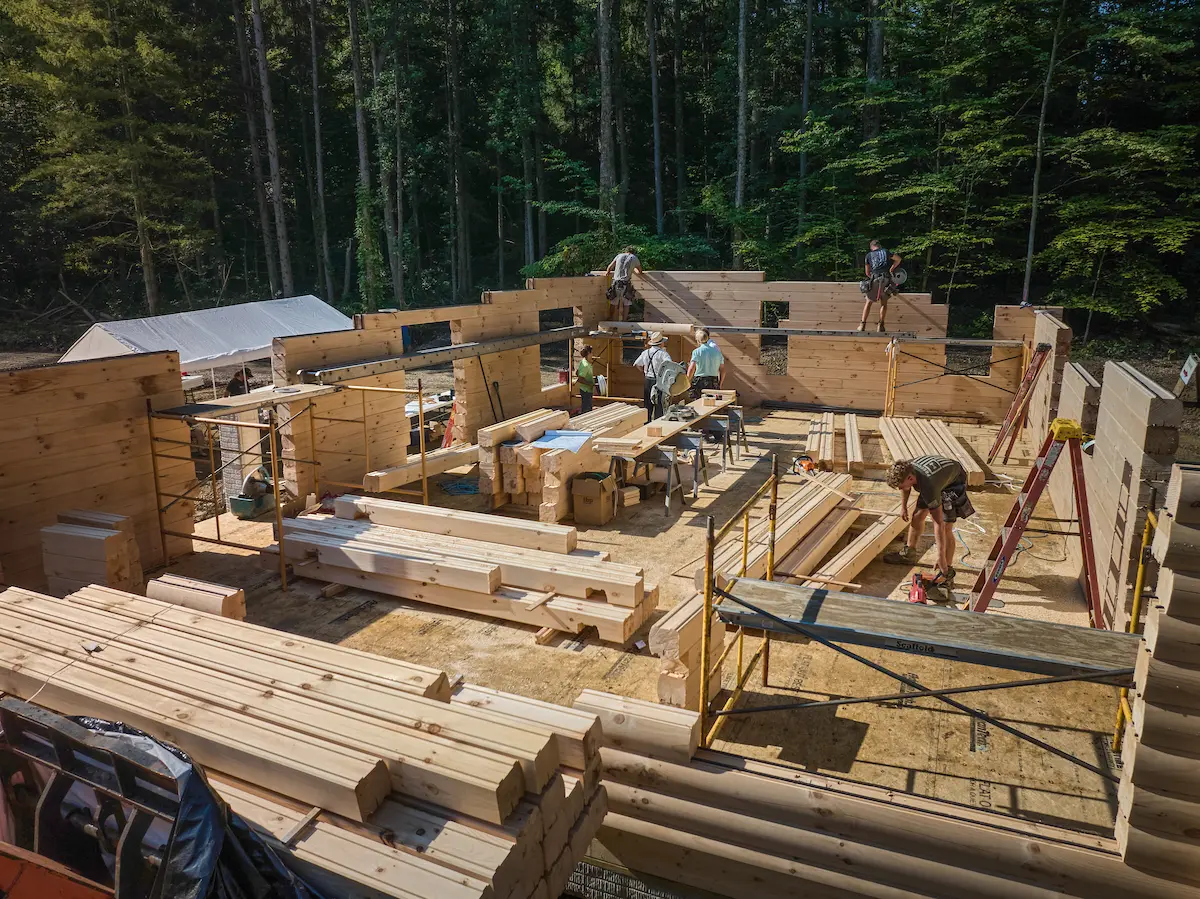
This is the phase most people imagine when they picture a log home being built. At the Trumpower Road Retreat logs arrive ready to be stacked, fitted, and secured, each course building on the last. As the walls go up, the familiar lines of the floor plan take shape, and you can begin to understand the scale of each room.
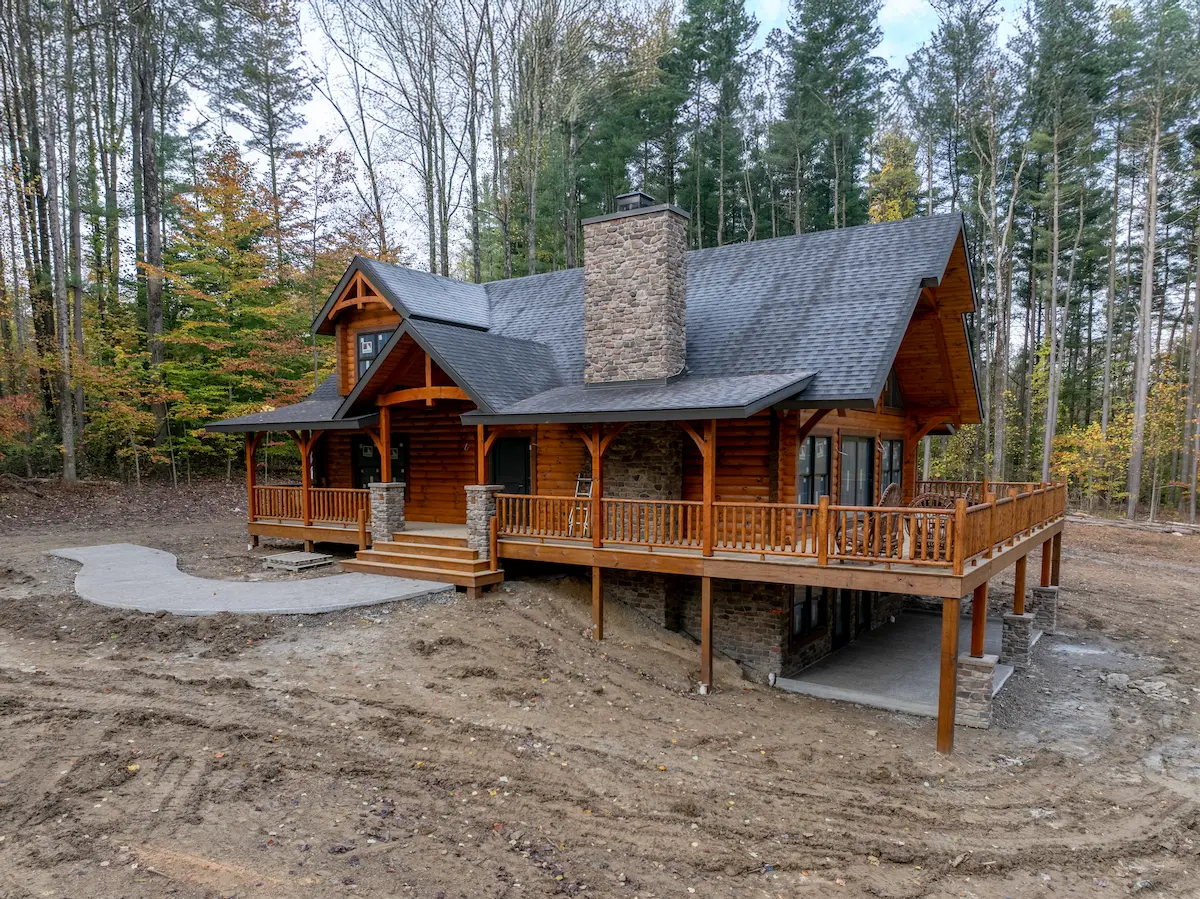
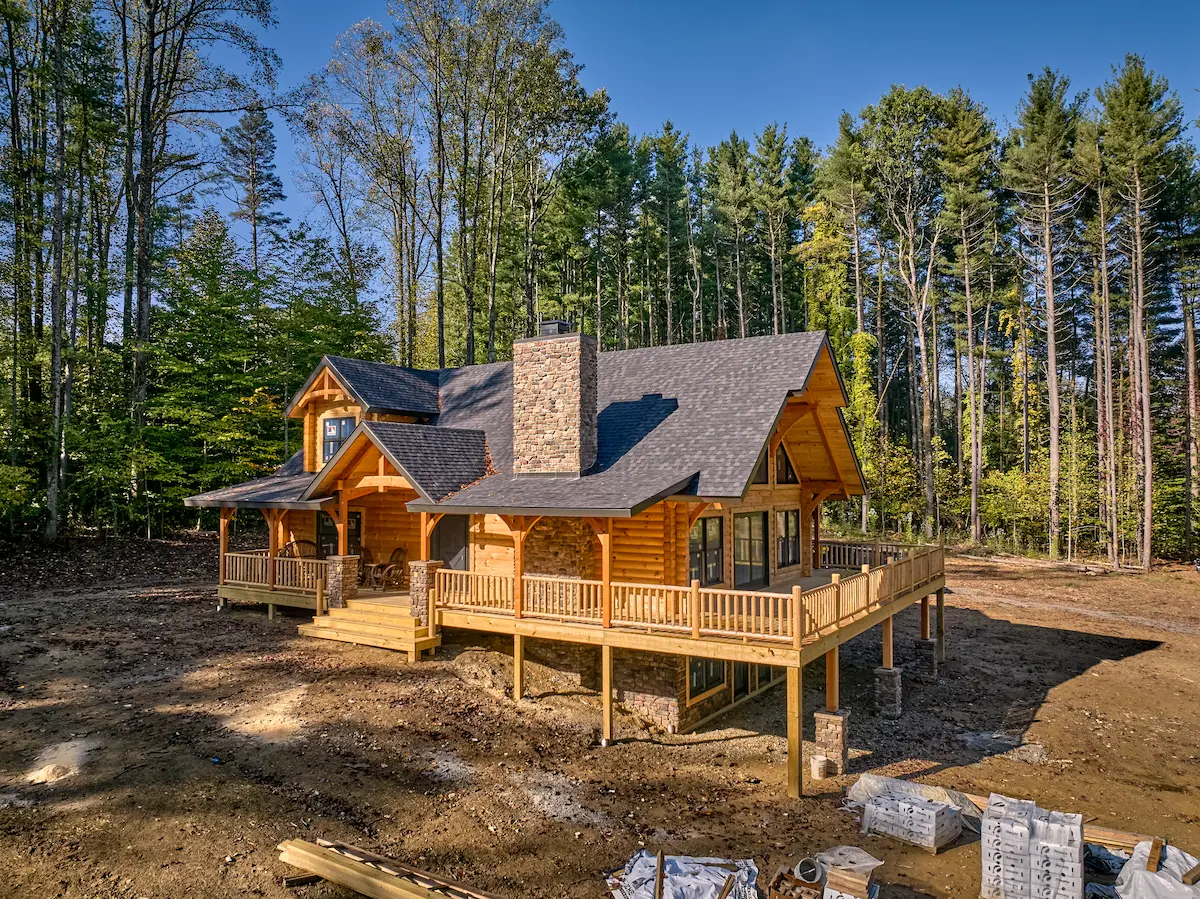
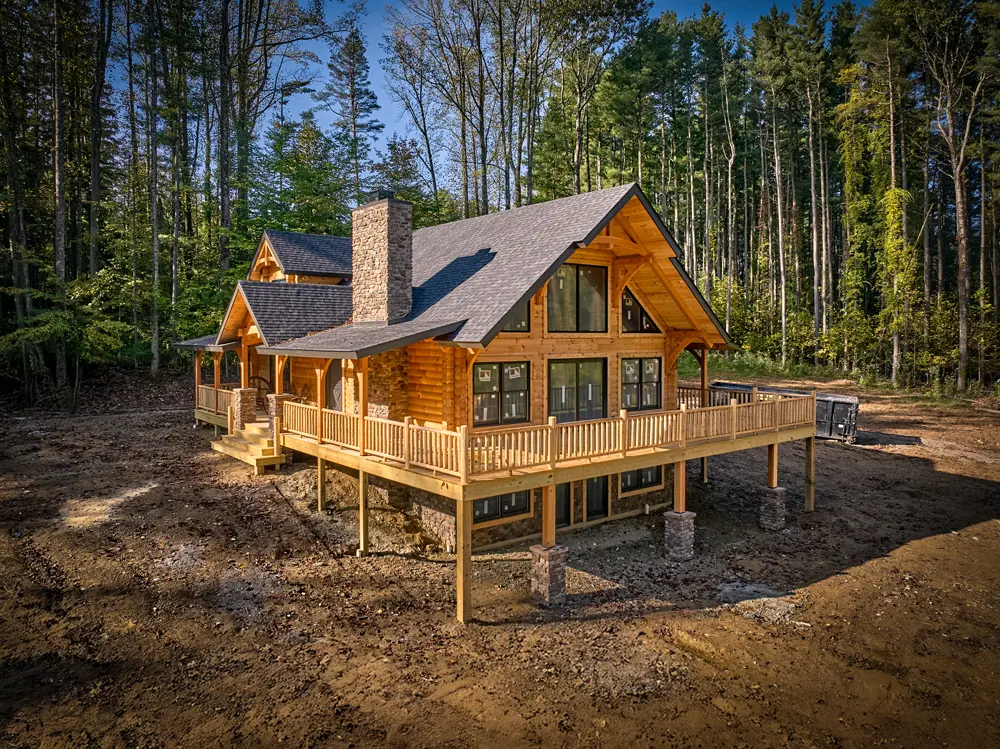
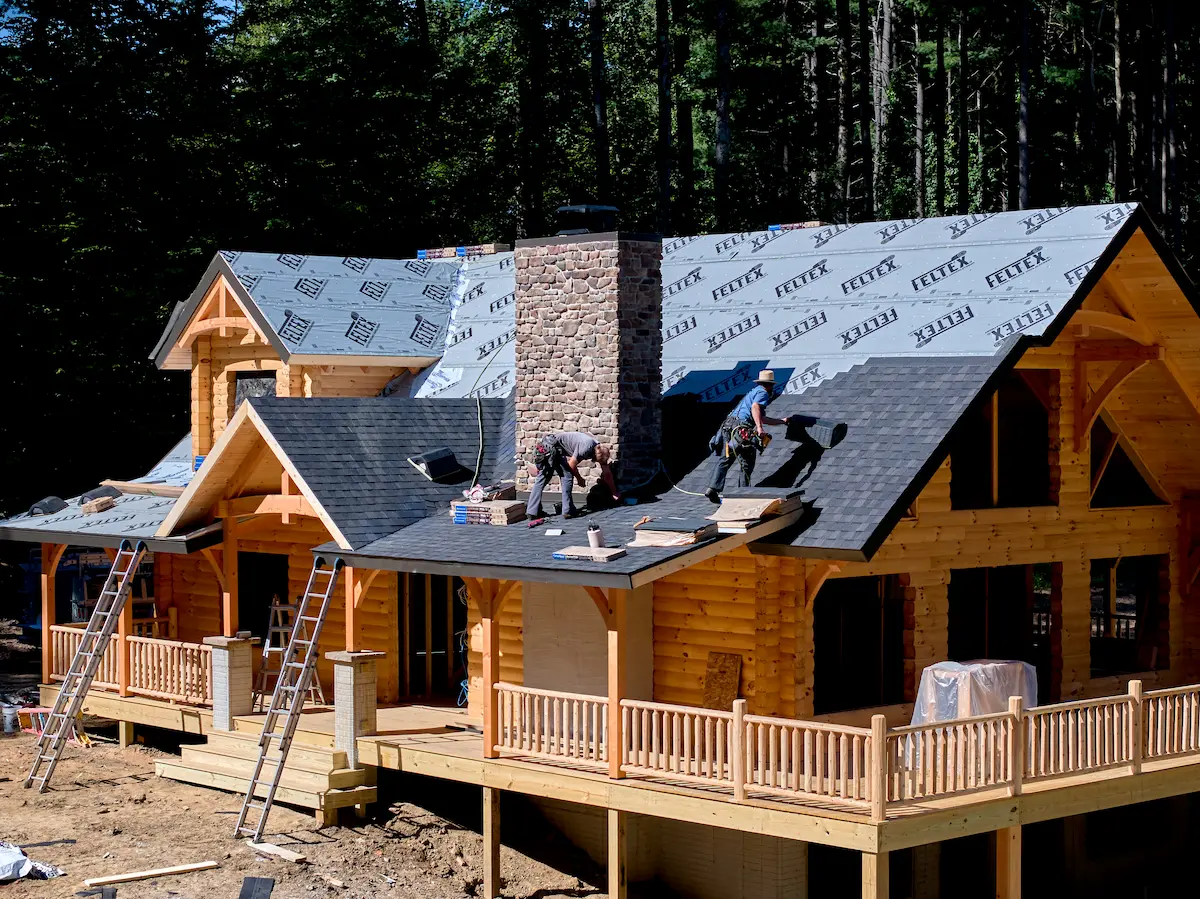
Once the shell is in place, the home starts to take on its finished shape. The crew moves from framing to the careful work of closing everything in. Roofing materials go on, windows are installed, and the structure is wrapped and sealed against the weather. Each step adds strength and protection, and you begin to see how the layout and proportions of the home come together. This is the point when the project shifts from a construction site to something that feels like a real house taking root on the property.
Once the exterior is secure, the focus shifts inside. Electrical, plumbing, and HVAC systems are installed, then covered with insulation and interior finishes. Rooms gain their shape as walls go up and flooring, cabinetry, and trim are added. This is where the character of the home starts to show. You can finally walk through each space and get a real sense of how the home will feel once it is lived in.
The final stage ties everything together. Lighting, fixtures, and hardware are installed, and the last pieces of trim and flooring are set in place. Outside, porches are completed, driveways are graded, and landscaping begins to soften the footprint of the home. Inside and out, these finishing touches bring warmth and personality, turning a newly built structure into a place that feels ready to live in.